


Airbrushing
If you are committed airbrushing will give you more options.
Airbrush - there are many airbrush variants and many manufacturers, it is often personal preference. Double or dual-action airbrushes are considered more flexible than single-action airbrushes because they allow users to modify paint volume accordingly. This is more beneficial when building scale models. However, this does not imply that the single-action brush cannot be used for painting models. Some users prefer single action because they are easy to use and handle.


There are a number of types available:
-
-
Single action - Press down the trigger controls airflow, basically, it is an on-off device, so do not try to control the airflow or pressure. That is done using the regulator on the compressor. Twisting the knob at the rear of the airbrush counter clockwise starts and increases paint flow until the knob is twisted completely out.
-
Advantages:
-
The separate air and paint controls make single-action airbrushes easier to use than double-action airbrushes. Allowing users to concentrate on moving their hand instead of concentrating on how far back the finger moves. Provides repeatable actions as everything is pre-set. Keeping air pressure and paint flow steady.
-
-
-
Double action - Press down on the trigger for air release - pressing down further release more air. Pull back on the trigger for paint release - pulling back further will discharge more paint. Dual-action, sometimes referred to as double-action, allows modellers and artists greater control. Dual-action airbrushes provide the user to produce incredibly fine lines and provide greater control of fading and blending for more detailed work. Good dual-action airbrushes are more expensive than single-action airbrushes because of the greater accuracy. Dual-action airbrushes also have a steeper learning curve than single-action airbrushes, so can take longer to develop full control and a disciplined technique.

Trigger or Pistol grip style airbrushes are one of the most useful types of airbrushes available, but they are not so popular amongst the average modeller.
There are plenty of trigger or pistol grip airbrushes on the market today, like the:
-
Grex TS.
-
Iwata - TRN1, TRN2, Neo TRN, HP-TR1, HP-TR2, HP-TH, HP-TH2.
-
Sparmax – GP-35, GP-50, GP-70 and GP850.
-
Harder & Steenbeck – Colani.
-
Mr Procon Boy - PS-275, PS-290.
-
Zoukei - Mura PM-C.
-
PointZero.
Despite the number of Trigger or Pistol grip style airbrushes available the interest in this specific style of airbrush is minimal.
Some manufacturers denote the ‘T/TR’ as ‘Trigger’ other ‘P/PS’ as ‘Pistol’.
The benefit of these types of airbrush is being a dual-action airbrush, it works somewhat like a single-action one. Pulling the trigger automatically mixes the air and paint, the more you pull the trigger the richer your mix becomes.
Advantages
-
Variations in finger or hand motions benefit people who do not have the dexterity to use a normal trigger.
-
The trigger mechanism stays cleaner for a longer period.
-
Tighter tolerances are obtainable.
-
Disadvantage
-
Trigger mechanism is more problematic to maintain.


- Gravity-feed - Gravity-feed airbrushes have a paint cup at the top of the airbrush where the paint is poured. With the aid of a compressor, gravity pulls small amounts of paint into the mixing chamber where atomization occurs.
- Side-feed - Side feed airbrushes are in-between, with the aid of a compressor, they can use a side gravity cup or side siphon-feed bottle. Most side-feed airbrush sets include a cup and bottles.
-
Siphon-fed - Siphon-fed airbrushes feature a bottle or cup connected to the bottom of the airbrush with a tube running through. With the aid of a compressor, the air is drawn into the top of the tube causing the paint to be ‘siphoned’ into the mixing chamber where atomization occurs.
I have separate airbrushes for different tasks I do not like mixing airbrushes with different types of paint, primers, or varnishes and each of my airbrushes is labelled for a specific task.
Examining the list below, yes, I have a lot of airbrushes, but these were purchased over many tears to see if one airbrush is better than the other, like many of my pieces of equipment. And, yes, there is a great disparity between airbrush manufacturers and models of airbrushes.
Often it is personal preference what airbrush you use, an airbrush recommended by one person may not be suitable for you. Airbrush parts vary greatly in quality. I have two cheap-no-name airbrushes that I have been using for many years that provide extremely good results and three expensive ones that I do not like. I have found that the two most important features when considering an airbrush are the quality of the tip and the needle. I have found that many expensive airbrushes have poor quality needles and when examining a tip under a microscope have found that the quality is not as good as one might expect. Airbrush tips also vary greatly and I have had two tips from €250 airbrushes with damaged tips and a number high end needles not
Unlike the expensive airbrushes where replacement parts are easily accessible, cheap airbrushes replacement parts are almost non-existent, so over the years I have learned to interchange parts and modify the cheap models with great results. All my airbrushes are thoroughly cleaned and lubricated after use; I do not leave dirty airbrushes on my workbench. If you spend money buying a good product, it should be looked after.
I use -
-
2 x infinity CRplus – one with a 0.15 mm needle, and the second with a 0.2 mm needle used for fine detail work, used for acrylic paint.
-
1 x Evolution ALplus with 0.2 mm needle used for fine detail work, used with enamels and lacquer paint.
-
3 x Evolution CRplus with 0.15 mm, 0.2 mm, and 0.4 mm needles used with enamels and lacquer paint.
-
2 x Evolution Solo with 0.2 mm, and 0.4 mm needles, used for acrylic paint.
Sparmax GP-50 – 1 x with 0.3- and 0.4-mm needles, used for acrylic paint.
-
2 x Sotar 20/20 Fine 0.21 mm needle, used for acrylic paint.
-
1 x Patriot 105 0.33 mm needle used for acrylic paint.
-
1 x Patriot Extreme 105 0.33 mm needle used for acrylic paint.
-
2 x Renegade Velocity with a 0.21 mm needle used with enamels and lacquer paint.
-
1 x Renegade Rage with a 0.33 mm needle used with enamels and lacquer paint.
-
2 x Hi-Line HP-BH 0.3 mm needle one used with acrylic paint, second used with enamels and lacquer paint.
-
1 x Custom Micron CM-B with 0.4-mm needle used with acrylic paint.
-
5 x Revolution Neo with various needle sizes used with acrylic paint, enamels, lacquer paint, primers, and vanishes.
-
1 x Neo TR1 with 0.3 mm - 0.4-mm needles used enamels and lacquer paint.
-
1 X Neo TR2 with 0.3 mm - 0.4-mm needles used with acrylic paint.
-
MIG Ammo - Aircobra with 0.3 mm needle used with acrylic paint.
-
-
Grex TS - 0.2 mm, and 0.4 mm needles used with acrylic paint.
-
-
Mr. Procon Boy PS-290 - with 0.5 mm needle used with acrylic paint.
-
-
Zoukei - Mura PM-C with 0.3 mm needle used with acrylic paint.
-
-
PointZero – with 0.35 mm needle used with acrylic paint.
-
-
8 x Cheap, no name - airbrushes used mainly for primers and varnishes.
I do not have or have never used either of -


Airbrush Nozzle

-
Spraybooth - Airbrush spray booths help remove unpleasant odours and noxious fumes while airbrushing your model kits/parts. They have large fans with filters and long flexible hose pipes to help suck harmful paint particles and fumes from the booth and filter them out of your house through the window or extraction system. But I still advise wearing a respirator mask for best safety. They also protect pets or people close to the spray environment. Airbrush spray booths can also protect items kept near the spray area, reducing over-sprayed.
-
Air compressor - a compressor specifically designed for model makers or artists is vital as the gauges are marked for the ease of lower pressures. Also, purchasing a compressor with a larger air tank will help reduce excessive noise. There is a colossal amount of no-name compressors available, but some of the best-named compressors come from:
I use a Sparmax TC-620X Compressor with a 2.5 L tank that is connected to a Sparmax 5 L tank with regular and water traps. And have an older Badger Aspire Pro TC910 compressor as a backup.
I have used cheap unbranded compressors, with and without air tanks and apart from the noise, they work well. But I would not recommend a compressor without an air tank as the air pressure fluctuations vary greatly.
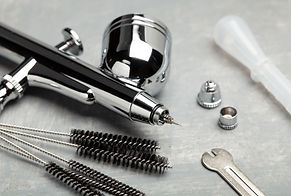
Cleaning equipment - whether you opt for a named or no-name airbrush, cleaning, and maintenance of airbrushes on a regular basis is a priority to ensure reliability.
I clean my airbrush thoroughly after each spraying session, but only deep clean my airbrush when weekly. Laqauers and varnish is a different matter, I always deep clean after use because lacquer and varnish tend to stick everything together if not removed entirely.
I use Dental absorbent paper points (the same dentists use to suck out moisture when doing a tooth root canal) to clean out the nozzles, these come in various sizes and fit through the smallest nozzle nicely. Each dental stick is colour coded according to size. White the smallest and black the largest in this pack.
When deep cleaning I place my airbrushes in a heated ultrasonic cleaner for 10 minutes, this helps dislodge any persistent residual. I do not use chemicals in the ultrasonic cleaner to prevent damage to the 'O' rings and springs.


Airbrushes needles come in several sizes and qualities:
Why have so many, and what do they do?
Airbrushes are sophisticated devices used for the application of mediums onto a surface. The main element of paint atomization is an airbrush needle. An airbrush needle is responsible for the mixing of paint with air and forming a spray pattern. Because of their sharp tips, needles are the most fragile parts of airbrushes. They can be easily damaged when knocked or dropped. At best, the needle will bend, and I have lost count of how many airbrush needles I have damaged, and often you may not notice the bend in the needle until it affects the spraying results.

How to choose airbrush needles
There are a vast variety and quality of airbrush needles from many manufacturers. And each offers a vast number of needle sizes for all types of airbrush models.
The main factor influencing needle choice is what is it intended to be used for, the type of airbrush you are using, and the size of the surface being airbrushed.
So, changing an airbrush needle will determine the amount of paint or varnish sprayed onto a model. Or will it?


There are other factors to consider. The nozzle, also known as the tip, and the needle size of the airbrush will determine the amount of paint that can be sprayed through it. Most airbrushes come with one nozzle and needle already fitted.
When you change an airbrush needle size, the nozzle and often the needle cap will need to be changed to allow the correct working of the spray amount and pattern. Also, forcing a large needle into a smaller nozzle can damage it.
Another factor is the type of paint being used. Although the likes of Vallejo, AK Interactive, MIG Ammo, Games workshop, etc provide paint ready to be airbrushed straight out of the bottle, I have found that not all paint is equal, it varies between manufacturer and even by the same manufacturer in the pigments of different colours. Many people advise, ‘thin your paint, primer or varnish’ others suggest ‘don’t bother'. Personally, I have found you can not equate a ‘do’ or do not’ paint thinning as it depends on the colour pigment or type of paint being used.
And if you decide to thin, buy how much? Over-thinning can breakdown the pigments, while not or under thinning may increase the incidence of tip drying or block.
How much to thin? Again, there is a wide consensus, and I have heard:
-
Consistency of ‘single cream’ (found this method too thick)
-
Flows like ‘milk’ (I find this difficult to visualize)
-
1:1 Ratio (Does not work for thicker pigment paints)
-
So that it runs down the airbrush cup easily without the pigments breaking up (my method, I can easily see how the paint reacts in the airbrush cup).


Airbrush Parts

Needle Caps help protect the tip of the needle from being damaged. There are a few designs, some enclosed, and others are partly open to ease needle tip cleaning when in use. Most experienced and professional users remove the needle cap entirely to make needle cleaning easier and to get better views while spraying.
